
Preparing Blueprint on Gmax :
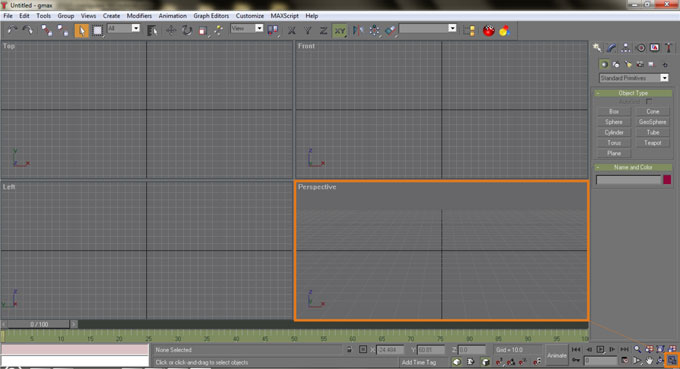
Open Gmax, it comes with 4 viewports and choose Perspective then click “min/max” toggle in the bottom right corner icon.
On perspective viewport try to familiarize rotating and panning the viewport. Click “Arc rotate icon” then place your mouse cursor inside a yellow circle inside perspective viewport then click and hold the left mouse button and drag left and right, up and down. Always drag inside the yellow circle because if you drag outside the circle you will ruin the horizon orientation on the viewport and you will get confused :p. Remember this is how to rotate the viewport or change your point of view not the object in it.
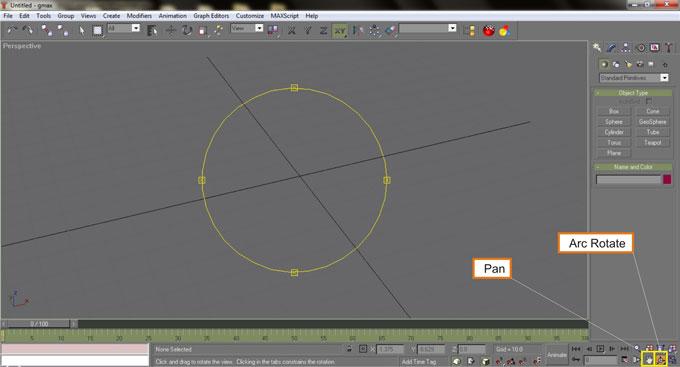
Click on the Pan icon, then drag with holding left mouse button left or right and up or down to pan the viewport. You can also panning while in Arc rotate mode by holding middle mouse button and drag your mouse.
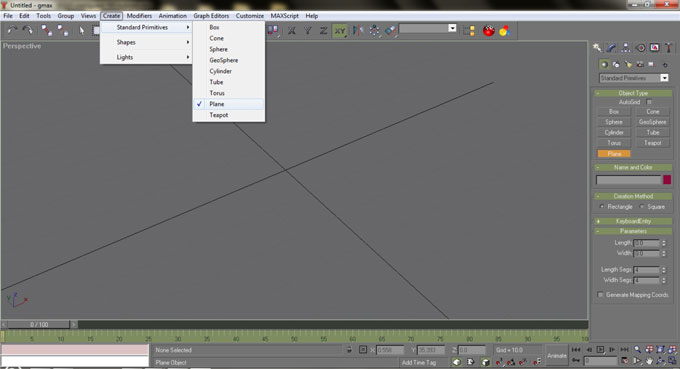
Now we’re going to create a plane geometry to be the blueprint container. There are two ways to create a plane. First by using upper menu : Click Create menu - choose Standard Primitives - then click Plane. Drag mouse to create a plane. Secondly by using right toolbar rollout, click on the cursor icon [Create], The default rollout will be Standard Primitives and choose Plane. Drag mouse on the viewport to create a plane.
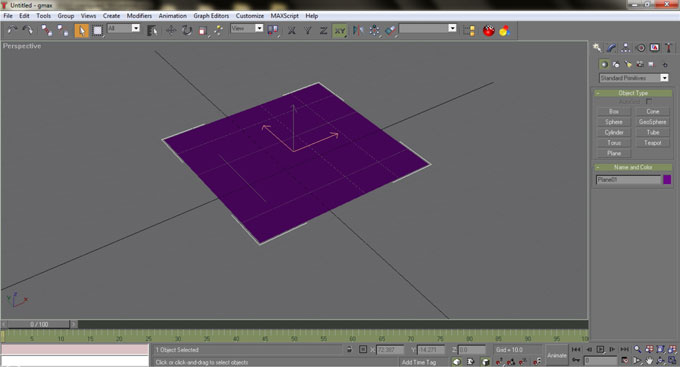
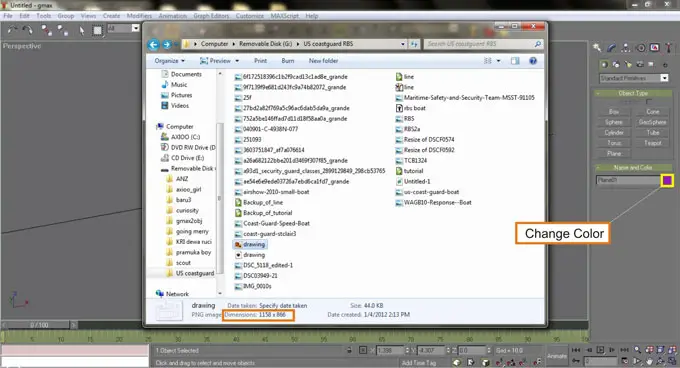
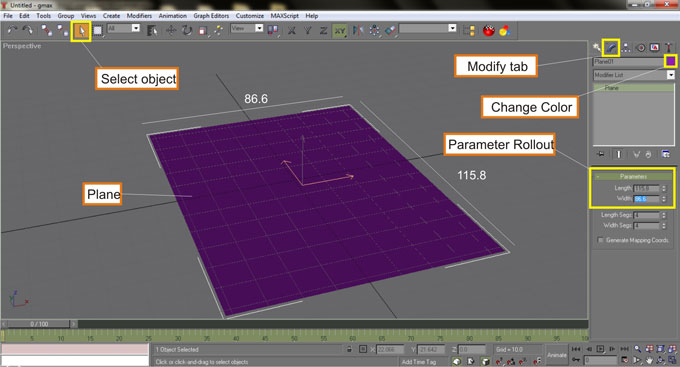
We have to adjust the plane dimension to match blueprint image width and length ratio. The drawing.png is 1158 x 866 pixel. Select the plane by choosing select the cursor button on the top toolbar first then click or select the plane. Go to right toolbar rollout then select “modify” tab and edit the width and the length with 115.8 and 86.6 so the plane will match the blueprint image ratio. The color of the plane that you create may not with same color as I make, because gmax always randomize the created object color. You can change the color by clicking on a color box on the Name and Color rollout or on Modify tab rollout, then change it into purple.
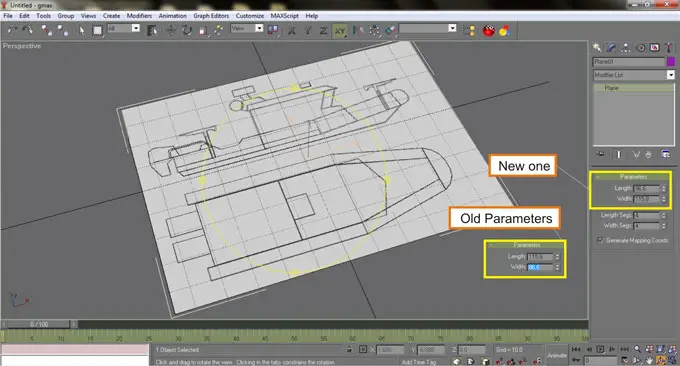
Drag the blueprint image [drawing.png] and drop it onto the plane, the plane will be instantly change color with blueprint image on the plane. Most of the time, at first the image will be not in the correct orientation, to correct it you have to switch the width with the length.
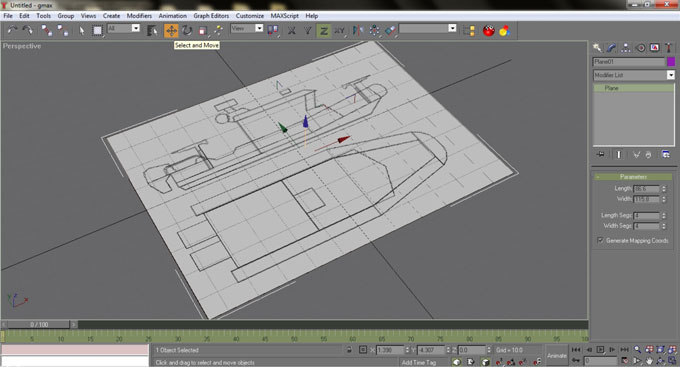
Now we have to copy the blueprint and place them according to the drawing orientation. First blueprint needs to lie horizontally and the second one vertically. Select “select and move” button on the top toolbar, then select the plane if it haven’t selected yet. Hover your mouse on top the “gizmo” [3 arrows colored green, red and blue], hover the mouse over the blue arrow until the line turns yellow then by press and holding the “shift” key first, drag it down then release. It will brings a small dialog window then leave it in default setup which is “Copy” then click ok. Now we have two plane.

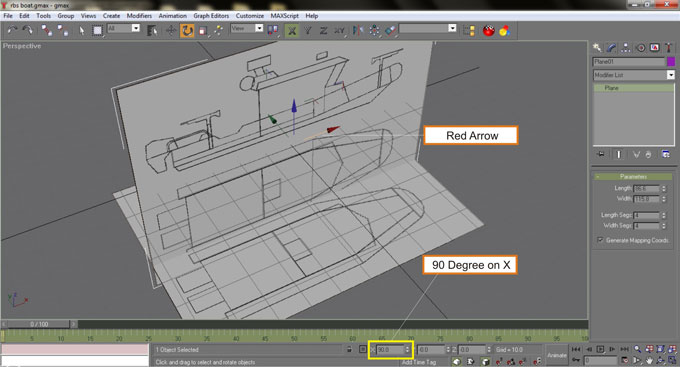
Select the top blueprint then click Select and Rotate button on the top toolbar. Select the red arrow of the gizmo then rotate the plane into 90 degree. Save your work here with the name : rbs boat.gmax
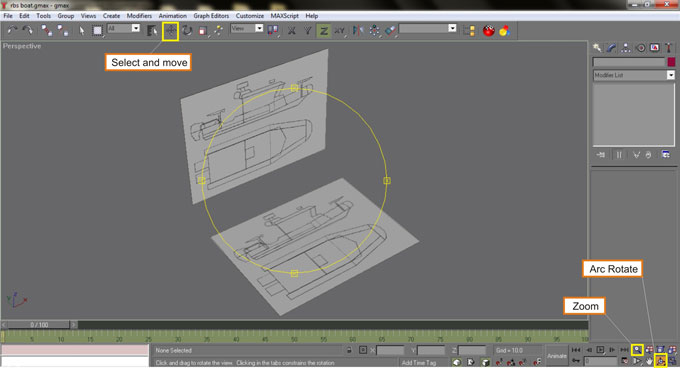
Arrange both blueprints in the way shown on the image below by using “Select and move” tool. Adjust your point of view by using “Arc Rotate” and “Zoom” function. You can zoom and un-zoom by scrolling your mouse wheel up and down. Press “G” key to toggle the 3d grid on or off. Now our blueprint are ready to use.
Click Next to continue to Modeling 3D boat :